Curious how to get clear live TV on your living room screen without a technical headache? This short guide walks you through a practical, step-by-step setup for a MAG set-top device so you can stream at home with confidence.
You’ll learn what the receiver does and what it doesn’t — the portal is the service, your broadband and TV handle the rest. Expect simple steps on choosing a model, a quick essentials checklist, network tips, portal entry, picture and audio tweaks, and basic troubleshooting.
This guide focuses on common UK router and HDMI setups but stays useful if you’re setting up a similar system in Canada or the US. It’s written for anyone setting up a MAG set-top for streaming at home today, and it explains roles clearly so you aren’t left guessing.
For a legitimate subscription option and more info on service offers, you can review GetMaxTV. For portal-specific steps, this helpful guide shows how to add or change a portal on MAG 424 devices: change the portal on a MAG.
If you want a legal IPTV subscription, check GetMaxTV’s offer and then follow the sections ahead to complete your setup without stress.
Key Takeaways
- You’ll get a clear, step-by-step setup you can follow without technical overwhelm.
- The set-top receiver displays service content; the subscription comes from a provider.
- Guidance targets common UK setups but is useful in Canada and the US.
- Expect sections on model choice, network setup, portal entry, and troubleshooting.
- Consider legitimate services like GetMaxTV for a compliant subscription.
What a MAG IPTV set-top box is and why it’s popular in the UK
Think of a MAG set-top as a dedicated appliance that turns online channel streams into a TV-ready signal. It is a purpose-built receiver that loads a provider portal and shows channels on your television with a simple remote.
Appliance-like receiver vs. generic streaming devices
The difference is ease. Unlike common media sticks or Android devices, these devices are configured for portal-driven workflows and remote-first navigation.
How it fits into your home systems
Typical setup flows like this:
- set-top box → HDMI → TV
- Ethernet/LAN or Wi‑Fi module → router
- Service portal (with provider credentials) delivers channels to the receiver
Two parts to buy or prepare: the hardware (your box) and the service subscription. Mixing those up causes delays.
Key terms you’ll see later: portal, MAC address, Ethernet/LAN, Wi‑Fi module, resolution, HDR, and audio passthrough.
Before you start: what you need for a smooth install

A quick pre-flight check and the right gear make the install fast and frustration-free.
Grab this first:
- HDMI cable (good quality)
- Correct power adapter for your model
- Stable internet—Ethernet/LAN or built-in Wi‑Fi module
- Your TV with an available HDMI input
- Optional: a USB drive for settings export or peripherals
LAN vs Wi‑Fi: Use Ethernet for the most reliable stream. Wi‑Fi works for convenience, but place the unit near the router if you expect high-resolution playback.
What your provider should give you: a portal URL or login details, MAC-based activation or credentials, and any region notes for channel groups or EPG. These items let the set top authenticate and load channels.
Find the device MAC on the label or in the system info menu. Providers often need that for activation, so note it before you call support.
Pre-flight check: Confirm your TV sees other HDMI devices and your router shows steady internet. You can usually fix cables and network issues locally; portal authorization or account status is solved by your provider or their support team. For a legal subscription option, consider a reputable provider like GetMaxTV service.
Choosing the right MAG box for your needs
Choose a model based on how you actually watch: casual channel surfing, 4K viewing, a Wi‑Fi-only room, or a hardwired living room. This helps you pick features that matter and avoid paying for extras you won’t use.
MAG555: a fuller-featured product
MAG555 adds Google TV™, Bluetooth 5.0, and Dolby Digital support. It has 2 GB DDR4 RAM and 16 GB eMMC storage, plus an Amlogic S905Y4-B chipset. That means smoother app use, more space for updates, and better audio handling for a paired soundbar.
Linux 4.9 appliance-style options
The linux 4.9 models (MAG544, MAG544w3, MAG540, MAG540w3) focus on being simple, reliable players. All offer 4K and hevc support with modest hardware (1 GB RAM, 4 GB eMMC).
Choose a “w3” variant if you need a built-in wi-fi module. Pick the LAN-only model for a wired living room where stability matters most.
Performance, storage, and viewing quality
1 GB vs 2 GB RAM affects responsiveness when menus or apps update. More eMMC means easier firmware updates and more headroom for caching. The chipset specs (2,000 MHz CPU, 16,500 DMIPS) handle 4K and hevc work efficiently.
4K improves resolution on compatible TVs. HEVC support reduces bandwidth needed for that same picture. HDR and Dolby Digital help image depth and surround sound when your TV or AVR supports them.
| Model | RAM / Storage | Network | Key feature |
|---|---|---|---|
| MAG555 | 2 GB / 16 GB eMMC | Wi‑Fi module + LAN | Google TV™, Bluetooth 5.0 |
| MAG544 / MAG544w3 | 1 GB / 4 GB eMMC | LAN (w3 = wi‑fi module) | linux 4.9, hevc support |
| MAG540 / MAG540w3 | 1 GB / 4 GB eMMC | LAN (w3 = wi‑fi module) | linux 4.9, compact form |
Buying tip: Check each product page for current price, stock, and offers before you buy. Compare legitimate listings in a focused search and consult a trusted review like this MAG review or this purchase guide to confirm model details.
iptv mag box uk setup steps you can follow in minutes
In a few simple moves you’ll connect hardware, join the network, and load channels.
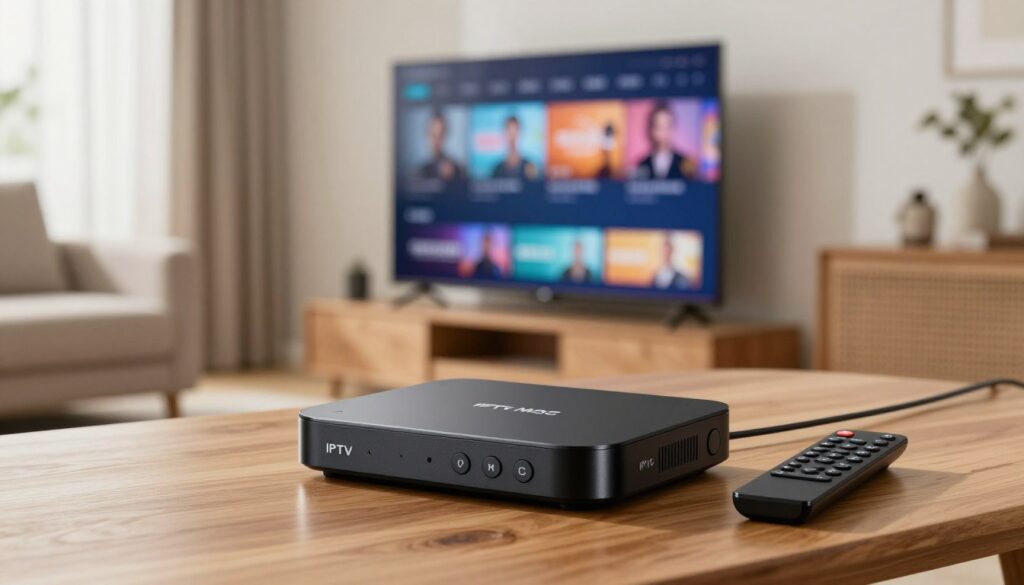
Physical setup: quick connections and first boot
Unpack the unit, plug the correct power adapter into the rear, and connect an HDMI cable from the device to your TV. Turn on the TV and select the matching HDMI input.
Power up the receiver and wait for the welcome screen. Use the remote to complete the basic on-screen prompts and set your language and time zone.
Network setup: LAN vs built-in wi-fi module
For rock-solid streaming use Ethernet/LAN. Plug a network cable into the router and the device for the best result.
If you have a w3 model with a built-in wi-fi module, choose Wi‑Fi when running a cable isn’t practical. Place the unit where signal is strongest and avoid thick walls.
Adding your service details and confirming channel load
Open Settings → Portal (or Server) and enter the portal URL or credentials your provider gave you. Save and wait for the menus to populate.
A successful channel load shows populated lists, an EPG, and playable streams. Test a few channels with the remote to confirm control and access. If nothing appears, check the portal spelling, confirm MAC activation with your provider, then reboot once after saving.
Video and audio tuning
Set output resolution to match your TV for the best picture. Enable HDR only if your screen supports it and the picture looks natural.
Adjust audio to passthrough Dolby Digital when using a receiver or soundbar. Use TV speakers if you don’t have external audio gear.
Finishing touches
- Run system updates and reboot.
- Set time zone and correct aspect ratio.
- Save preferences so settings persist after power cycles.
Need a quick reference or honest review? See the MAG review for model notes and service advice.
Getting the best picture and audio from your MAG device
A few simple setting changes can make 4K look sharper and audio clearer on your TV.
4K and HEVC tips: smoother playback and lower bandwidth use
HEVC helps 4K streams by keeping quality high while reducing the data the stream needs. With proper hevc support you’ll often get smoother playback at the same visual detail.
“Switch to HEVC when available to lower strain on your connection without losing sharpness.”
HDMI and TV settings that commonly improve quality right away
Use a known-good hdmi cable and plug into a TV input that explicitly supports 4K/HDR. Enable the TV’s enhanced HDMI or HDMI UHD Color mode when needed.
If your internet stability is uneven, choose steady HD instead of forcing max resolution. Different media sources behave differently; keep notes on what works best for movies versus live sports.
Simple audio alignment: pick PCM for direct TV sound or passthrough when using a receiver. Test with a single channel you trust and adjust volume and delay until dialogue syncs.
For legal service options and device info, see GetMaxTV setup.
Remote control and accessories that make setup easier
Small accessories often make the biggest difference when you want a smooth, reliable system.
Original replacement vs. multi-purpose remotes
Choose an Original Replacement Remote Control when you want reliable button mapping and fewer setup headaches.
Original remotes match menu layouts, navigation, and special keys. They tend to pair quickly and feel familiar during daily use.
Multi-purpose remotes are handy if you prefer one product for TV and receiver control. Confirm compatibility before buying so you don’t lose essential keys like menu or portal navigation.
Picking the correct power supply
Use the right adapter to avoid startup failure. Older series require 12V adapters. Newer linux models require 5V.
Wrong voltage prevents proper startup. Check the model number on the unit or listing before you buy.
Label the adapter as soon as you confirm it. That avoids mixing it with other household power bricks.
Practical buying tips and small extras
- Check the product listing for exact model numbers and what’s included.
- Compare price across reputable sellers and read recent reviews.
- Keep a spare remote or extra batteries for main living-room setups.
| Accessory | Key benefit | When to choose |
|---|---|---|
| Original replacement remote | Reliable mapping, smooth navigation | If you want zero-guessing control and fewer setup steps |
| Multi-purpose remote | One product for multiple devices | If you need fewer remotes and confirm full compatibility |
| Correct power adapter | Ensures proper startup and stable operation | Match 12V or 5V to your model; label it immediately |
For model-specific notes and a detailed review, see this concise product review.
Troubleshooting common MAG box issues without the stress
If your screen goes blank or channels fail to appear, start with a calm, step-by-step check of cables and inputs.
No signal or blank screen
Check the TV input first. Make sure you chose the correct HDMI port. Try another HDMI port if the TV has more than one.
Swap the HDMI cable with a known-good cable. Lower the device output resolution if the screen stays blank and reboot the unit.
Buffering and freezes
Prefer wired when you can. Ethernet/LAN is more stable than Wi‑Fi in busy homes. If you must use Wi‑Fi, place the unit away from enclosed cabinets and bulky electronics.
Test internet speed on a phone or laptop, then try the receiver on a wired link to separate Wi‑Fi issues from service problems.
Remote not responding
Check batteries and line-of-sight. Reboot the unit and re-pair if the remote loses control. If buttons remain inconsistent, an original replacement remote often fixes mapping and reliability.
Audio problems
Switch output between PCM and passthrough to match your TV or AV receiver. If sound is missing after changes, verify the TV or receiver supports the chosen format and reboot after each change.
When to contact support
If channels won’t load after you confirm cables and network, contact your provider with your device MAC and portal URL for quicker resolution. For device-focused troubleshooting and smart player guidance, see this portal help and this smart player guide.
Support, warranty, and buying considerations in the present market
Before you click Buy, pause to check who stands behind the product and what help is available after delivery.
What operator support and buyer support cover
Operator support usually helps service integrators with portal, platform, and activation issues. It may not cover end-user setup.
Buyer support comes from the seller or dealer and handles returns, basic setup, and defective units.
Warranty and post-warranty service checklist
- Confirm warranty length and what faults it covers.
- Ask how replacements or repairs are handled after warranty ends.
- Keep proof of purchase and serial/MAC info for claims.
Stock, price, and product page green flags
Buy from an official dealer—Infomir-authorized sellers simplify warranty claims and firmware authenticity. On the product page look for a clear model number, stated connectivity, included accessories, transparent price, and current stock or delivery times.
| Item | Why it matters | What to check |
|---|---|---|
| Warranty | Protects your purchase | Length, coverage, proof needed |
| Stock | Affects install timing | Available now / shipping ETA |
| Dealer | Simplifies service | Infomir dealer or official reseller |
Conclusion
Finish strong: Complete the setup by verifying connections, entering the portal details, and testing several channels to confirm playback.
Quality wins: Use a wired LAN where possible, match output to your TV, and enable hevc support only if your devices and display handle it. These steps reduce freezes and improve picture.
When you buy, compare operating systems (linux 4.9 vs Google TV), check RAM and USB/storage, and pick a reliable remote control and correct power supply for your model. Keep firmware current and save your settings.
If you want a legal subscription and a simple starting point, review the GetMaxTV offer for straightforward plans and activation guidance.
FAQ
What is a MAG box and why do people choose it for home streaming?
A MAG box is a purpose-built set-top receiver designed to work with IPTV services. You pick it for reliable playback, HEVC (H.265) support, HDR and Dolby Digital audio on compatible models, and for integrations like a Wi‑Fi module or Ethernet. The hardware and firmware focus on media delivery, which often gives smoother channel switching and lower latency than general-purpose streaming devices.
What do you need before you start setup?
Have your TV with an available HDMI port, a compatible power supply, and a stable internet connection via LAN or the built-in Wi‑Fi module on w3 models. Also get your IPTV service portal details or account credentials from your provider so you can add them during setup.
How do you physically connect the device to your TV?
Connect an HDMI cable from the receiver to your TV, plug in the correct power adapter, then select the matching HDMI input on the television. Power on the device and follow the on-screen first-boot prompts to complete basic setup.
Should you use wired Ethernet or Wi‑Fi for best performance?
Use wired Ethernet when possible — it gives lower latency and more consistent throughput. If you must use wireless, choose a MAG model with the Wi‑Fi module (w3 versions) and place your router close to reduce drops and buffering.
How do you add your IPTV service details and confirm channels load?
Enter the portal URL, username, and password supplied by your service into the device’s network or provider settings. After saving, reboot the receiver if required. Channels and the EPG should populate; if they don’t, double-check the portal address and credentials with your provider.
Which models support 4K and HEVC playback?
Look for models that explicitly list 4K and HEVC (H.265) support, such as recent MAG4xx and MAG5xx variants. These devices handle higher resolutions, improve compression efficiency, and often include HDR support for better color and contrast.
What audio features should you check for optimal sound?
Confirm Dolby Digital or passthrough support if you use a soundbar or AV receiver. Check audio output options in settings and set passthrough or the correct output format to ensure surround sound works as expected.
How do you improve picture quality right away?
Use an HDMI 2.0+ cable for 4K content, enable HDR only if your TV supports it, and set output resolution to match your TV. Updating the device firmware can also fix playback issues and improve compatibility.
What if the screen is blank or you get “No Signal”?
Verify the HDMI cable is fully inserted and the TV input matches the connected port. Try a different HDMI cable or TV port, and check the device’s resolution setting to ensure it’s compatible with your television.
How do you stop buffering and freezes?
First, test internet speed and prefer LAN over Wi‑Fi. Move the router closer, reduce network congestion, or use a wired connection. If problems persist, check for firmware updates and restart both the receiver and your router.
My remote control isn’t responding — what should you try?
Replace batteries and ensure line-of-sight to the receiver. If using Bluetooth or a paired remote, re-pair it via the device menu. You can also use a compatible replacement remote control or a universal remote that supports the model.
What power adapter should you use for different models?
Confirm the correct voltage and amperage for your specific model — many use a 12V adapter, while smaller units may use 5V. Using the wrong supply can damage the device, so always use the official or manufacturer-recommended power unit.
What does operator support and buyer support usually include?
Operator support generally covers service-related issues like portal access and channel lists. Buyer or product support covers hardware faults, firmware updates, and setup guidance. Check the seller’s product page for exact support terms before purchase.
How do warranty and post-warranty service work?
Standard warranties vary by brand and seller; they often cover manufacturing defects for a set period. Confirm warranty length and whether spare parts, repairs, or replacements are available after the warranty expires.
Where can you check stock, price, and availability before buying?
Look on official vendor pages, authorized resellers, and reputable marketplaces. Product pages should list stock status, warranty, full specs (like RAM, eMMC storage, chipset), and any available offers or replacement accessory options.
What specs matter when comparing performance and storage?
Focus on RAM size, eMMC or flash storage capacity, and the chipset. More RAM and faster storage improve navigation and app performance; a capable chipset ensures smoother 4K and HEVC playback.
The GetMaxTV Team is a group of cord-cutting experts and streaming technology specialists who have been testing and reviewing IPTV services since 2022. Based in North America, our team personally tests every service we recommend across 15+ devices including Fire TV Stick, Roku, Apple TV, Samsung Smart TVs, and gaming consoles. We verify channel counts, measure buffering rates, test picture quality in HD and 4K, and evaluate customer support response times. Our mission is to help viewers save money by switching from expensive cable subscriptions ($147/month average) to affordable, high-quality IPTV alternatives. Every article on GetMaxTV.com is based on hands-on testing and real-world experience — not recycled marketing claims.