Ready to cut costs and get stable streaming without the usual headaches?
You can build a reliable home streaming hub that balances low monthly bills, stable playback, and simple management.
This guide walks you step by step through the full setup: OS Lite install, TVHeadend for channel management (web UI at port 9981, HTSP at 9982), and playback with Kodi’s PVR client or VLC.
Prefer Ethernet and a static IP for smooth streaming and easy access to the local website. Use an external SSD formatted as ext4 with TRIM enabled and mounted by UUID for safe recordings.
Keep your device cool—use heatsinks or a fan to stay under 70°C—and secure default TVHeadend credentials immediately.
Why this matters: pairing this setup with a value-focused service like GetMaxTV integration guide gives you thousands of channels and VOD for about $6.95/month with 24/7 support, instant activation, and no contract.
Key Takeaways
- Follow a clear setup path: OS Lite, TVHeadend, and Kodi or VLC for playback.
- Use wired Ethernet and a static IP for stable streaming and easier access to the web UI.
- Format SSD as ext4, enable TRIM, mount by UUID, and set permissions for reliable recording.
- Keep the board under 70°C with proper cooling to avoid throttling.
- Secure TVHeadend ports (9981/9982) and change default credentials immediately.
- Pairing this setup with a budget-friendly service reduces costs and troubleshooting time.
Why build IPTV on Raspberry Pi in 2025 and how GetMaxTV maximizes value
In 2025, a compact single-board system can turn your living room into a full-featured streaming hub.
Your goals: stable streams, simple setup, and a low monthly bill. Use a Raspberry Pi 4 with a reliable 5V/3A power supply and wired Ethernet to host TVHeadend and play via Kodi or VLC. Add an external SSD and proper cooling to keep recordings and playback steady. Assign a static IP so web admin pages stay predictable.
Why value matters: GetMaxTV bundles over 19,000 live channels and 97,000+ VOD for $6.95/month with all sports and movie features included. There’s no contract, activation takes about two minutes, and real 24/7 support means weekend games and late-night movies just work.
Your priorities: stable streams, easy setup, low cost
You want zero hidden fees and one login. Pairing a dependable device with a value-first service gives predictable access and less tinkering. Add your playlist, test playback, and you’re done.
For a quick comparison of choices, see the best value service and decide which fits your user needs.
What you need before you start: hardware, network, and power basics

Before you power up, collect the parts that keep a home server stable for years. A reliable foundation means fewer monthly costs and less time troubleshooting.
Core hardware
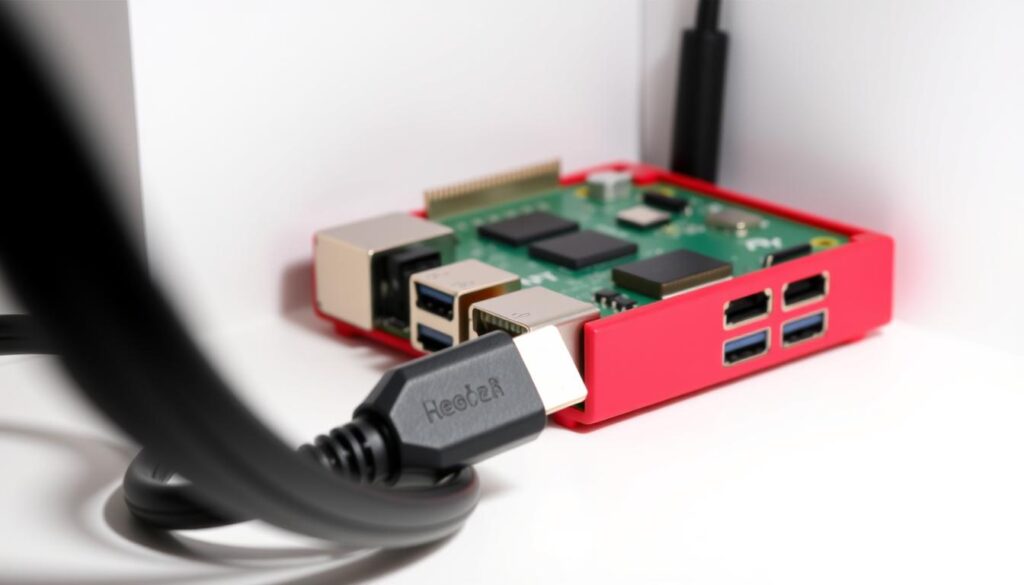
Use a raspberry 4 with a proven 5V/3A power supply to avoid reboots and corrupted writes. Flash Raspberry Pi OS Lite to a Class 10 microSD card (32GB is ample) for the OS.
Add an external SSD for recordings and heavy I/O. Good choices: Samsung 860 EVO, Crucial MX500, or Samsung T7. Format the drive as ext4 for best durability and speeds.
Networking and addressing
Prefer Ethernet for your primary network connection to keep throughput stable; keep Wi‑Fi as a fallback. Reserve a static IP in your router so the admin page and player endpoints never shift.
Cooling, power draw, and reliability
Fit heatsinks or a small fan and monitor temps during long sessions to stay under 70°C. Thermal control prevents throttling that hurts system performance.
Disable onboard Wi‑Fi and Bluetooth when unused to cut idle power draw. Short, high-quality SSD and Ethernet cables help maintain consistent speeds and reduce errors.
- Tip: Plan the physical layout—Pi, SSD, and switch—in a ventilated cabinet to keep dust and heat away.
- Result: Choose hardware once and your monthly bill can be just the GetMaxTV subscription.
IPTV on Raspberry Pi: install, configure, and connect your streams
Start with a clean OS and you’ll go from blank card to live channels in minutes.
Prepare the OS: Flash Raspberry Pi OS Lite, boot the board, and run a quick update: sudo apt-get update. These steps ready the environment for software installs and basic programming tweaks.
Install TVHeadend and secure the web interface
Install with one command: sudo apt-get install tvheadend. Open the TVHeadend web UI at http://[your Pi IP]:9981, change the admin password, and set recording paths to your SSD.
Add a player and load your playlist
In Kodi enable the PVR IPTV Simple Client and paste your playlist and EPG URLs. Use VLC for quick testing and stream checks if a channel misbehaves.
Final settings, groups, and testing
- Prefer HTSP at port 9982 for efficient playback.
- Create channel groups for sports, news, and movies.
- Test a few streams, start a short recording, and verify SSD permissions.
“Change credentials and use a static IP — it saves time and avoids lost access.”
If you plan to connect server endpoints remotely, map only needed ports with NAT/PAT and keep admin access locked. Keep power stable during installs and reboot once after major settings changes.
Network setup and VPN considerations for smooth, secure streaming
A steady network and clear access rules keep streaming reliable and private.
Assign a static address by reserving a DHCP lease or creating a static reservation in your router. This keeps your web admin page and players pointed to the same host every time. After boot, verify DNS and time sync; bad resolution can break playback even when the connection looks fine.
Home and remote access basics
For remote access use precise NAT/PAT rules. Forward only needed ports: 9981 (web), 9982 (HTSP), and media ports like 554, 1935, and 8080. Pair this with tight firewall rules to allow media flows but stop scans and brute force attempts.
When to use a VPN
Consider a vpn if you suspect your isp is throttling or if you want to hide traffic from third parties. Test latency and speeds before you make it permanent. A vpn can protect privacy but may reduce throughput, so evaluate performance first.
“Reserve static addressing, lock down ports, and test a VPN — it gives you control without surprises.”
| Task | Tool/Port | Why it matters | Quick check |
|---|---|---|---|
| Static address | DHCP reservation | Keeps admin website reachable | Ping hostname after reboot |
| Monitor bandwidth | iftop / nethogs | Shows which servers use your connection | Run while streaming |
| Remote access | NAT/PAT + firewall | Limits exposure and keeps data safe | Test from mobile data |
- Keep logs minimal so you can trace issues without exposing private data.
- Document router and firewall settings for quick recovery after updates.
- Balance convenience with safety: expose less, require strong credentials, and update the system often.
Performance tuning: storage, power, and stream quality optimization
A few targeted tweaks to your server and network keep streams steady and CPU use low. Focus first on durable storage, then on power habits and network settings to improve playback quality.
Use SSD for recordings and reliable booting
Move recordings and heavy I/O to an external SSD formatted as ext4. Enable TRIM and mount by UUID so the server boots consistently even if USB ordering changes.
Point TVHeadend recordings to the SSD and verify directory permissions so the system can write without errors.
Reduce power draw and stabilize USB devices
Disable unused Wi‑Fi and Bluetooth to cut idle power and reduce radio interference. Run a quality 5V/3A supply to keep USB drives and tuners stable during peak activity.
Throughput and buffer tips
Prefer Ethernet for higher sustained speeds and lower jitter. Increase buffer sizes in your player and TVHeadend profiles to absorb short network dips.
Avoid transcoding when possible; direct-play preserves CPU headroom and improves stream quality.
Scaling up: streams, tuners, and bandwidth planning
Expect about 4–8 concurrent clients depending on bitrates and your internet speeds. Plan bandwidth and LAN switching accordingly, and check USB power budgets before adding tuners.
“Optimize once and enjoy smooth viewing—then spend your budget where it matters.”
| Area | Action | Why it matters |
|---|---|---|
| Storage | SSD, ext4, TRIM, mount by UUID | Prevents boot issues and supports heavy I/O for recordings |
| Power | Disable radios, quality 5V/3A supply | Reduces reboots and keeps USB devices stable |
| Network | Ethernet, larger player buffers | Lower jitter and fewer visible stalls |
| Scaling | Count streams, check bandwidth, add tuners carefully | Ensures reliable concurrent playback and prevents overload |
For a deeper build guide that covers system layout and best practices, see building a media center with Raspberry Pi. Optimize once and enjoy smooth viewing forever—then spend your budget where it matters: GetMaxTV’s giant library at $6.95/month.
GetMaxTV on your Raspberry Pi: the easiest way to watch everything
GetMaxTV plugs directly into your streaming build so you can open the guide and watch in minutes.
Why GetMaxTV wins on value: you get over 19,000 live channels and 97,000+ VOD for just $6.95/month. All sports and movie packages are included with no extra fees and no contract.
Instant activation and 24/7 support
Activation is usually done in about two minutes. If you need help, real support is available around the clock.
Universal compatibility and quick connect
Use Kodi’s PVR IPTV Simple Client to paste playlist and EPG URLs, then reload to populate your guide and channel lineup.
You can also play the same links in VLC to verify streams fast. Let TVHeadend manage groups and guide data while Kodi handles playback if you prefer a split backend/frontend.
“Open the guide, pick a channel, and watch—no extra fees, no app juggling.”
- Ethernet as your primary connection keeps streams consistent during big events.
- If you use a vpn for privacy or travel, test latency and throughput to keep iptv streaming smooth.
- Start today by visiting the monthly plan page or message support on WhatsApp for a free trial.
Conclusion
After these steps your home server will deliver steady streams and simple web access.
Verify your setup: Raspberry Pi OS Lite with TVHeadend (web :9981, HTSP :9982), an ext4 SSD with TRIM and UUID mounts, a static IP, and Ethernet first for the best connection and speeds.
Keep performance healthy: stay under 70°C, monitor bandwidth with iftop or nethogs, and test streams after changes. Consider a vpn for privacy or to reduce throttling, but measure speeds first.
Save basic notes or posts, clear unused cookies if the web admin misbehaves, and document your steps for quick recovery. When you’re ready to watch more for less, subscribe to GetMaxTV now at https://getmaxtv.com/.
Not ready to commit? Try a free, no‑obligation trial via WhatsApp: https://wa.me/message/OZ4NORVZQTYAC1 and test channels on your device before you subscribe.
FAQ
How do I start setting up my Raspberry Pi for streaming with GetMaxTV?
Begin with Raspberry Pi OS Lite, update packages, and attach a reliable power supply (5V/3A). Install TVHeadend or Kodi and secure the web interface. Add the GetMaxTV playlist and EPG to the PVR IPTV Simple Client or VLC, then test playback over a wired Ethernet connection for best performance.
What hardware and storage should I use for best reliability?
Use a Raspberry Pi 4 for stable performance, heatsinks or a fan to keep CPU under 70°C, and an external SSD formatted ext4 with TRIM enabled. Mount by UUID and set correct permissions to avoid corruption and improve stream buffering and media access speeds.
Do I need a static IP and how do I configure networking?
Assign a static IP on your router or via DHCP reservation to ensure predictable access. Prefer Ethernet for lower latency; use Wi‑Fi only as backup. Verify DNS settings and test connection speeds to confirm adequate bandwidth for multiple channels and smooth playback.
How can I secure remote access and protect my network?
Use NAT/PAT and strict firewall rules to limit exposure. If you allow remote connections, change default ports and enable HTTPS where possible. Consider a commercial VPN to avoid ISP throttling and to add privacy when accessing streams away from home.
What about bandwidth and concurrent streams planning?
Estimate 5–8 Mbps per HD stream and 15–25 Mbps for 4K. Plan total bandwidth based on concurrent viewers, tuners, and transcoding overhead. Use Ethernet and optimize buffer sizes in your player to prevent stutters during peak use.
How do I reduce power draw and improve longevity?
Disable unused services like Bluetooth and onboard Wi‑Fi if you rely on Ethernet. Use a stable 5V/3A PSU and avoid heavy transcoding on the device. Proper cooling and an SSD instead of a microSD card also reduce wear and improve reliability.
Which player apps work best with GetMaxTV and your setup?
Kodi with PVR IPTV Simple Client and VLC both work well. Kodi offers a smooth TV-style interface and EPG integration; VLC is lightweight for direct playlist testing. Both run on Windows, Mac, Android, Fire TV, and your Raspberry Pi setup.
What troubleshooting steps should I follow for buffering or dropouts?
First switch to wired Ethernet and check throughput. Confirm SSD health and CPU temperature. Reduce simultaneous streams, disable transcoding, and increase buffer sizes in the player. Finally, test a different server or playlist source to isolate server-side issues.
Is it legal and safe to use third‑party streams and services?
Use only legitimate, licensed services like GetMaxTV that clearly publish content and terms. Avoid unknown third‑party streams that may violate copyright or expose you to malware. Always read the service agreement and follow local laws and ISP policies.
How fast will setup and activation take with GetMaxTV?
Activation typically finishes in about two minutes after purchase. You’ll receive playlist and EPG details along with setup instructions. Support is available 24/7 if you need help adding the playlist to Kodi, TVHeadend, or VLC.
Can I scale this setup for multiple rooms or users?
Yes. Add more tuners or increase server capacity for more concurrent streams. Use managed switches and proper VLANs to separate media traffic. Ensure your upstream internet plan supports total bandwidth for simultaneous viewing.
What maintenance does the system need over time?
Keep OS and apps updated, monitor SSD health and temperatures, and periodically check playlist/EPG links. Backup key config files and keep an eye on network performance to catch ISP or server changes early.
The GetMaxTV Team is a group of cord-cutting experts and streaming technology specialists who have been testing and reviewing IPTV services since 2022. Based in North America, our team personally tests every service we recommend across 15+ devices including Fire TV Stick, Roku, Apple TV, Samsung Smart TVs, and gaming consoles. We verify channel counts, measure buffering rates, test picture quality in HD and 4K, and evaluate customer support response times. Our mission is to help viewers save money by switching from expensive cable subscriptions ($147/month average) to affordable, high-quality IPTV alternatives. Every article on GetMaxTV.com is based on hands-on testing and real-world experience — not recycled marketing claims.