The traditional cable TV model is crumbling. A shocking 80 million Americans have cut the cord in 2026, fleeing average monthly bills of $147. Streaming now represents a massive 47.5% of all TV viewing.
People want freedom, choice, and control over their entertainment. This is where Internet Protocol Television shines. It delivers live television and vast on-demand libraries directly over your internet connection.
Kodi is the perfect platform to harness this power. This highly customizable media player lets you bring all your favorite content into one beautiful, organized hub. You can transform your setup into a central command center for global entertainment.
Our comprehensive walkthrough shows you the best method. We provide a clear path to a stable, high-quality viewing experience that’s easy to manage on any device.
Key Takeaways
- Cord-cutting is a major trend, with high costs driving viewers to streaming.
- IPTV provides a flexible and often more affordable alternative to cable.
- The Kodi software acts as a powerful, unified media center for all your content.
- Setting up this combination organizes live TV and on-demand media in one place.
- Following a reliable guide ensures a smooth and stable installation process.
- This approach gives you direct control over your entertainment lineup.
- You can access thousands of channels and movies from around the world.
Understanding IPTV and Kodi Basics
Before diving into setup, let’s clarify the core technology behind internet-based TV. Knowing how these systems work helps you troubleshoot issues and get the most from your setup.
What is IPTV?
Internet Protocol Television delivers your favorite shows and movies over the web. It converts broadcast signals into data packets sent through your broadband connection.
This method is different from old-school satellite or cable. You can watch a huge selection of live channels and on-demand movies from across the globe.
Why Kodi is Ideal for Streaming
Kodi is a powerful, open-source media center. Its main strength is bringing all your entertainment sources into one easy-to-use library.
The software is highly customizable. You can add features through official and community-built add-ons. This flexibility lets you organize channels and videos exactly how you like.
It turns your device into a personal command center for all your digital media. You manage everything from a single, cohesive interface.
Preparing Your Device for IPTV on Kodi
A little preparation goes a long way in creating a smooth, buffer-free streaming experience. Let’s get your hardware, software, and network ready to handle everything.
Hardware Requirements
Your device should have at least a dual-core processor and 2GB of RAM. This power is necessary to handle high-definition streams without stuttering.
Verify these specs before you start. It prevents playback errors during live television or movies.
Software Updates and Kodi Version
Always update your system to the latest software. For the media player, use versions like 20 Nexus or 21 Omega.
These updates provide critical security and performance patches. They ensure compatibility with the latest add-on features.
Network Optimization Tips
A stable internet connection is vital. Your required speed depends on the video quality you want to watch.
| Video Quality | Minimum Speed | Recommended For |
|---|---|---|
| Standard Definition (SD) | 10 Mbps | Basic channels |
| High Definition (HD) | 25 Mbps | Most sports and shows |
| Full HD / 4K | 40 Mbps+ | Cinematic movies |
For the best results, use a wired Ethernet connection. This can significantly reduce the latency often experienced by users on Wi-Fi.
Adjust your network settings for a wired connection to watch your favorite content without interruption.
Installing IPTV on Kodi with PVR IPTV Simple Client
The next step involves activating a pre-installed client to bridge your playlist and the player. This built-in tool is your gateway to a seamless live TV experience within the media center.
You will use the PVR IPTV Simple Client. It comes ready in the official Kodi repository. No extra downloads are needed.
Installing the Add-on
Open your software and navigate to the add-ons section. Select Install from repository and find the PVR clients category.
The simple client is listed there. Click install to add it to your system. This add-on is the most reliable bridge for your streaming service.
Configuring Your M3U Playlist
After installation, go to the add-on’s settings. You will see a field to enter your playlist URL.
Paste your unique M3U link provided by your service. Save the settings and exit the menu. A quick restart of your application loads all the new channels into your guide.
| Step | Action | Key Detail |
|---|---|---|
| 1. Access Repository | Navigate to PVR clients | Located in the official repository |
| 2. Install Add-on | Select and install the client | Pre-installed, no download needed |
| 3. Configure | Enter your M3U playlist URL | Use the add-on settings menu |
| 4. Restart | Reload the application | Channels populate in your TV guide |
Adding and Managing Your M3U Playlist

Your playlist file is the key that unlocks all your live channels within the software. This text-based file contains the data your PVR client needs to find each stream.
You have two main ways to add it. You can use a remote link or a downloaded file on your device. Both methods are straightforward.
Entering a Remote Playlist URL
This is the most common method. In your PVR client settings, paste the full link provided by your service.
The software will fetch the channel list from this address automatically. This means updates from your provider appear without any extra work from you.
Always double-check the URL for typos. A single wrong character will stop the playlist from loading correctly.
Importing Local M3U Files
Some users prefer to download the M3U file to their computer or streaming box first. You then point the client to that specific file location on your storage.
This method is handy if your internet connection is sometimes unstable. The channel data is already on your device, ready to go.
Managing your list is essential. Refresh it manually in the settings if your guide seems out of date. Remove any broken links to keep your lineup clean and fast.
For a smooth setup process, many find guidance like this resource on how to easily installed IPTV on Kodi very helpful.
Optimizing Streaming and Playback Settings
Getting the most from your live TV requires dialing in a few key performance settings. These tweaks can turn a frustrating, buffer-filled experience into a smooth and reliable one.
Think of it as fine-tuning your car for a long road trip. The right adjustments ensure everything runs perfectly for the journey ahead.
Adjusting Cache Settings
The cache is your software’s short-term memory for video data. Adjusting it helps if your internet connection is slow.
Navigate to the player settings menu. Here, you can increase the cache value. This tells your system to buffer more data ahead of time.
If you face frequent interruptions, try reducing the cache size instead. This can sometimes improve stability for live video streams.
Enhancing Playback Quality
For crystal-clear video, match your inputstream settings to your hardware and network speed. This step is crucial for high-definition content.
Enabling hardware acceleration in the settings menu often provides a much smoother experience. It lets your device’s graphics chip handle the heavy lifting.
Make a habit of checking these configurations regularly. A quick review ensures your device is always optimized for the best performance.
- Visit player settings to modify cache values.
- Select the correct inputstream for your setup.
- Turn on hardware acceleration for HD streams.
- Test different settings to find what works for you.
Customizing Your Viewing Experience on Kodi
Now that your streams are up and running, it’s time to make the interface truly your own. Personalizing your layout turns a basic channel list into a tailored entertainment command center.
Organizing Channels and Creating Favorites
You can easily organize your channels by creating custom groups. This helps you categorize content like sports, news, and entertainment for faster navigation. It keeps your library neat and logical.
Adding your most-watched programs to a favorites list is a game-changer. You never have to scroll through hundreds of options to find what you want. Your top picks are always one click away.
Customizing the interface allows users to hide unwanted entries. This makes the overall library much cleaner and easier to browse daily. You remove the clutter and focus on what matters.
The software provides intuitive tools for users to rename channels or change their order. You get complete control over your digital television layout. By grouping your media effectively, you create a personalized experience that matches your unique viewing habits.
Troubleshooting IPTV Streaming Issues
A stable internet connection is the backbone of smooth streaming, and checking your speed is the first logical step. Even with great setup, occasional glitches can happen. This guide helps you solve the most common problems quickly.
Fixing Buffering Problems
If your video constantly pauses, start by testing your network. Your internet provider might slow your connection during peak usage time. This is called throttling.
Next, visit the media player’s settings menu. Clearing the application cache often forces a fresh load of data. Many users find this instantly improves playback.
Resolving Connection Errors
Errors often mean your playlist link is outdated. Always check with your service provider to confirm your subscription is active. They can give you a new URL.
If one channel won’t load, try another stream source. Good services offer multiple streams for the same content. Updating your playlist or restarting the app fixes most issues.
Remember, troubleshooting takes a little time but is usually simple. These steps will get you back to watching in no time.
Exploring Additional IPTV Add-ons and Features
Your viewing experience can be significantly enriched by integrating advanced program guides and additional streaming features. The core setup gets you live television, but these extras deliver a polished, professional interface.
They offer deeper control over how you watch and organize your content. Think of them as premium upgrades for your media center.
Official vs. Third-Party Add-ons
While the official PVR clients are highly recommended, some users explore third-party addon options. These can unlock specialized features like advanced catch-up or recording.
Always be cautious when installing software from outside the official repository. The official options are generally safer and more stable for your device’s security.
Sticking with trusted sources protects your system. It ensures compatibility with future updates to your software.
Configuring Advanced Features and EPG
Configuring the Electronic Program Guide, or EPG, is a vital step. This feature shows current and upcoming TV listings directly within your interface.
You can choose between various EPG services. This ensures your channel guide data is accurate and easy to read at all times.
Advanced features let you customize how your IPTV provider delivers content. Look for options like time-shifting and accessing archived programs.
These services transform a simple channel list into a powerful TV hub. They give you the full schedule and control you expect from modern IPTV services.
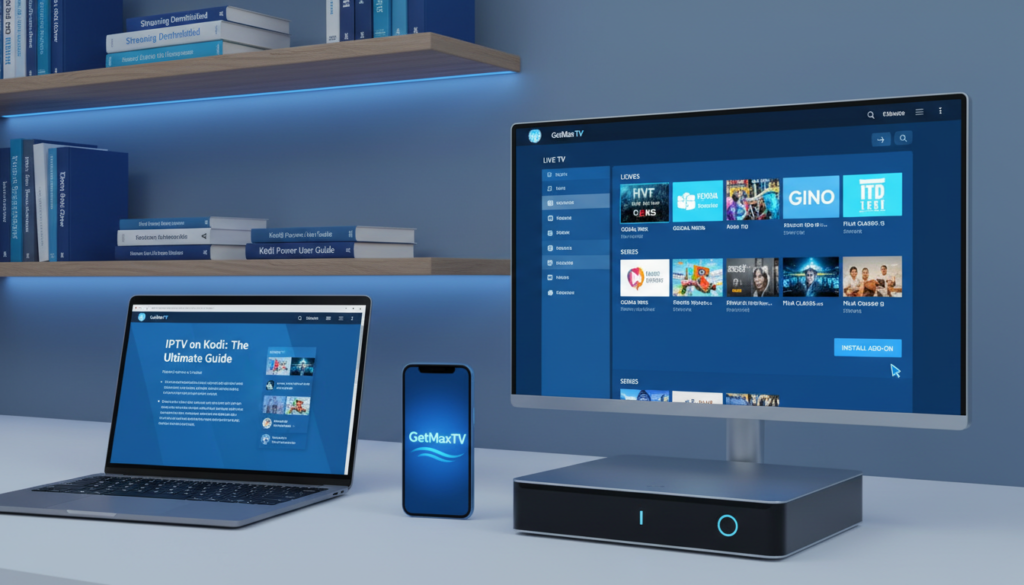
Why Choose GetMaxTV
A premium streaming service transforms your device into a world-class entertainment hub. The right provider delivers unmatched reliability and value for your monthly investment.
Unlock Premium IPTV Content with 21,000+ Live Channels
GetMaxTV provides an exceptional library. You gain access to over 21,000 live channels and 97,000 video-on-demand titles.
Everything streams in crisp HD and 4K quality. The service boasts a 99.9% uptime guarantee, so your favorite shows are always ready.
This vast selection puts countless entertainment options at your fingertips. It’s designed for users who want the best.
| Feature | GetMaxTV | Standard Services |
|---|---|---|
| Live Channels | 21,000+ | Often under 5,000 |
| Video Quality | HD & 4K Standard | Mixed SD/HD |
| Uptime Guarantee | 99.9% | Often Unstated |
| Monthly Starting Price | $6.95 | Typically $10+ |
Start Your 24-Hour Free Trial - Learn More
You can test everything risk-free. Start a full 24-hour trial with no credit card required.
Plans begin at just $6.95 per month, backed by a 30-day money-back guarantee. Their 24/7 support team is ready to help via WhatsApp.
It works on your Fire TV, Roku, Smart TV, and other media boxes. Visit GetMaxTV to upgrade your home entertainment system today.
Conclusion
You’ve now unlocked a powerful new way to enjoy television, putting you in complete control of your entertainment. This guide has shown you to configure your device, manage your M3U file and other playlists, and solve common issues with ease.
Remember, a reliable IPTV provider is essential for high-quality streaming. They deliver consistent value and keep your channels running smoothly across all your favorite devices and streaming boxes.
Take some time to explore the various services and customization options. You can tailor the interface, group your channels, and organize your media library to match your tastes. This makes your system truly your own.
Thank you for following this comprehensive walkthrough. We hope you enjoy your new, optimized setup and all the incredible content it brings for years to come!
FAQ
What exactly is internet protocol television?
Internet protocol television is a service that delivers live television and video-on-demand content directly over the internet, instead of through traditional cable or satellite methods. It uses a network connection to stream media to your device.
Why do people use Kodi for their streaming?
Kodi is a powerful, free, and open-source media center that acts as a universal hub for all your digital content. Its flexibility allows you to integrate various streaming services, including IPTV, through official add-ons like PVR IPTV Simple Client, creating a unified and customizable viewing experience on one platform.
How do I get the PVR IPTV Simple Client add-on?
This official add-on is installed directly from the Kodi repository. Navigate to the “Add-ons” section from the main menu, choose “Install from repository,” select “Kodi PVR clients,” and find “PVR IPTV Simple Client.” Click install, and it will be ready to configure in your system’s PVR settings.
Where do I put my M3U playlist link in the settings?
After enabling the PVR client, go into its settings. Under the “General” tab, you’ll find the “Location” option. Set this to “Remote Path (Internet address)” and then paste your full provider’s playlist URL into the “M3U Play List URL” field. Save and restart Kodi to load your channels.
My streams keep buffering. What can I do?
Buffering is often a network or server issue. First, ensure you have a stable and fast internet connection. Within the PVR IPTV Simple Client settings, try increasing the “Cache size” under advanced options. Also, connect your device via Ethernet instead of Wi-Fi for a more reliable signal if possible.
What’s the difference between official and third-party add-ons?
Official add-ons, like PVR IPTV Simple Client, are vetted and available in the official Kodi repository. They are generally stable and secure. Third-party add-ons come from outside sources and can offer different features but may carry risks like instability, security vulnerabilities, or legal issues regarding content.
The GetMaxTV Team is a group of cord-cutting experts and streaming technology specialists who have been testing and reviewing IPTV services since 2022. Based in North America, our team personally tests every service we recommend across 15+ devices including Fire TV Stick, Roku, Apple TV, Samsung Smart TVs, and gaming consoles. We verify channel counts, measure buffering rates, test picture quality in HD and 4K, and evaluate customer support response times. Our mission is to help viewers save money by switching from expensive cable subscriptions ($147/month average) to affordable, high-quality IPTV alternatives. Every article on GetMaxTV.com is based on hands-on testing and real-world experience — not recycled marketing claims.