Did you know that by 2026, over 80 million Americans will have cut the cord? Traditional cable bills now average a staggering $147 per month. Meanwhile, streaming services account for 47.5% of all television viewing.
The way we watch TV has changed forever. There’s a better way to take control of your home entertainment. Setting up IPTV on Raspberry Pi gives you an unparalleled, custom alternative to expensive subscriptions.
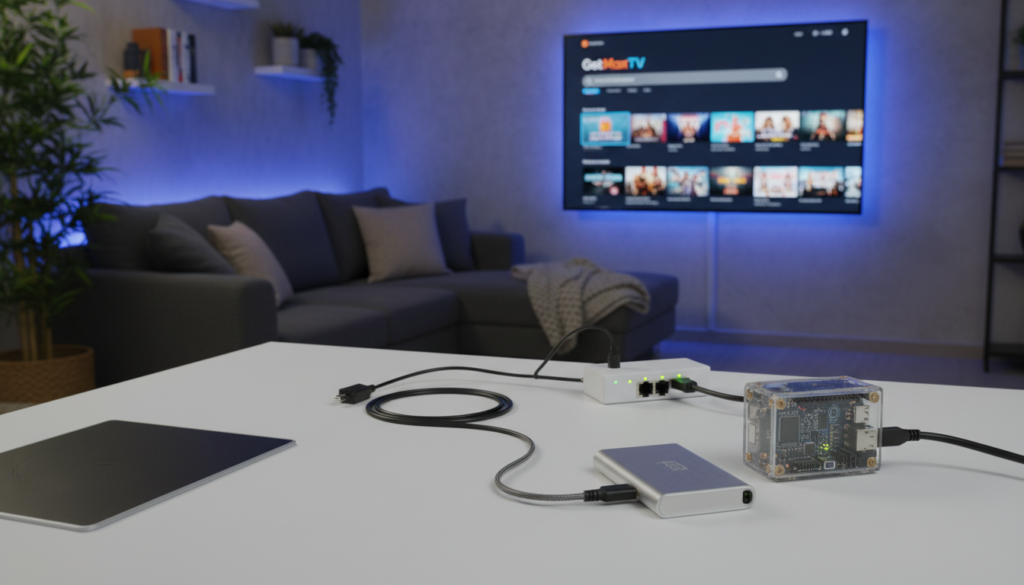
We recommend starting with the Model B version of a versatile, credit-card-sized computer. It transforms into a professional-grade media powerhouse for your living room. This guide will show you how.
Building your own system allows you to create a tailored streaming environment. You can manage live video streams effectively. Ensure stable, long-term performance for daily use.
Our walkthrough focuses on professional configurations that prioritize reliability. You’ll learn to set up a robust, always-on media traffic controller. Avoid the common pitfalls that doom many DIY projects.
Ultimately, you gain full command over your media distribution. Move beyond simple playback to a sophisticated server-based architecture. It’s time to build your dream setup.
Key Takeaways
- Over 80 million Americans are projected to cut the cord by 2026, driven by high cable costs.
- Building your own streaming device offers a customizable and cost-effective alternative to traditional TV.
- The Model B version of a popular single-board computer is the recommended hardware for this project.
- This guide provides a professional, step-by-step walkthrough to ensure a reliable setup.
- You’ll learn to manage live streams and create an always-on media server for your home.
- Focus on stable configurations to avoid common DIY streaming failures.
- Gain complete control over your media distribution with a server-based architecture.
Introduction to IPTV on Raspberry Pi
At the heart of a custom streaming setup is a dedicated server that organizes and routes live video feeds. This system acts as your personal broadcast center. It takes incoming streams and sends them to your TVs, tablets, and phones.
Think of software like TVHeadend as a smart stream router. It has a built-in database to manage inputs, map channels, and set user permissions. Your home network gets a powerful traffic controller.
The small computer hardware keeps everything running smoothly. It stays on all the time, directing video data reliably. You avoid the buffering and drops common with weaker devices.
Unlike locked-down commercial services, you build custom channels. Organize live streams exactly how you want. Access your lineup on your own terms, from any compatible player.
This project is about creating a delivery system, not a content service. You bring the streams; the setup handles the rest. It’s the ultimate way to take command of your viewing experience.
Required Hardware for Your IPTV Box
Your custom media center’s reliability starts with choosing the correct hardware foundation. The right components ensure smooth, uninterrupted streaming day after day.
Let’s break down the essential parts you’ll need. We’ll focus on performance and long-term stability.
Raspberry Pi Model Selection
You need a compute unit with enough power. The Raspberry Pi 4 Model B is the best choice here.
Its true gigabit Ethernet and superior USB architecture provide the necessary CPU headroom. This handles multiple live streams without any stuttering.
External SSD, Power Supply, and Accessories
For your primary storage, skip standard microSD cards. Live TV workloads involve frequent small writes that destroy flash memory.
Instead, use a high-quality external SSD like the Samsung T7 or Crucial MX500. It delivers speeds that match gigabit connections for reliable recording.
Always pair your setup with a stable, high-amperage power supply. This prevents voltage drops that cause random disconnects.
Proper cooling is also non-negotiable. An active cooling case keeps temperatures below 70°C for consistent operation.
| Component | Recommended Spec | Key Purpose |
|---|---|---|
| Compute Unit | Raspberry Pi 4 Model B | Handles multiple streams with gigabit Ethernet |
| Primary Storage | External SSD (e.g., Samsung T7) | Ensures fast, reliable recording and playback |
| Power & Cooling | 3A+ PSU & Active Case | Prevents disconnects and maintains temperature |
Installing Raspberry Pi OS Lite and Essential Updates
Before managing any streams, you must establish a lean and secure software base. The recommended operating system is Raspberry Pi OS Lite. This version lacks a graphical desktop, which minimizes resource usage for your media server.
Flashing the OS and Enabling SSH
Use the official Raspberry Pi Imager tool on your computer. Select the Lite image for your compute unit. Before writing, click the settings icon to enable SSH and set a custom hostname.
This step prepares your microSD card for headless operation. You can then connect to it over your network immediately after boot.
Setting the Timezone and System Updates
Once connected via SSH, your first command should set the correct timezone. Use sudo timedatectl set-timezone Your/Timezone. Accurate system time is vital for your electronic program guide to function properly.
Next, run the essential updates. Execute sudo apt update && sudo apt upgrade -y. This ensures your server has the latest security patches and performance improvements.
For an efficient setup, consider disabling unused features like Wi-Fi and Bluetooth. This can help keep total power consumption low.
Setting Up TVHeadend for Stream Management

The real magic happens when you set up the software that will manage your channels. TVHeadend acts as the brain of your operation. It organizes raw video feeds into a clean, watchable lineup.
Installing TVHeadend on Raspberry Pi
First, install the application from the Debian repositories. Run the command sudo apt install tvheadend in your terminal. This pulls in the necessary packages for your media server.
After installation, verify the system service is active. Use sudo systemctl status tvheadend. You should see a “running” status, confirming the software is ready.
Configuring the Web Interface and Credentials
Open a web browser and go to your device’s IP address followed by :9981. This is the primary control interface. The initial setup wizard will appear.
You must create a secure admin username and password here. This step protects your network from unauthorized access. It is a critical security measure for your streaming setup.
Once logged in, you can map incoming IPTV streams into organized channels. The interface on port 9982 handles the actual video delivery to your players.
Configuring Your Storage for Reliable Performance
A robust storage configuration is the unsung hero of a flawless streaming experience. Your media server runs around the clock, handling constant data writes from recordings and live buffers. A weak setup here creates bottlenecks that lead to stuttering and failed recordings.
You’ll want to format and mount your drive correctly from the start. This prevents permission errors and ensures long-term stability for your entire system.
Formatting the SSD with ext4
The ext4 filesystem is the best choice for your external drive. It’s stable, well-supported, and handles constant write operations perfectly. This is ideal for a server that records and manages streams all day.
After formatting, the critical step is mounting the drive using its UUID. You also need to set the correct file permissions. This allows your streaming software to access the storage for saving recordings without any issues.
Don’t forget to enable TRIM support for your SSD. This simple command helps maintain its speed and extends its lifespan significantly.
By pointing all recording directories to this external drive, you protect the device’s internal flash memory from wear. Your timeshifting and recording buffers will then work smoothly, even during high-demand periods.
Integrating Electronic Program Guides (EPG) with XMLTV
A complete media guide transforms your streaming setup from a simple list into a browsable, informative television experience. The XMLTV format is the standard for delivering this scheduling data separately from the video stream itself.
Installing XMLTV Tools
Begin by installing the XMLTV tools package on your server. This software enables the automated retrieval of program data for your various television channels. Run the command sudo apt install xmltv to get started.
After installation, the crucial step is manual mapping. You must match your channel names precisely to the entries in the XMLTV guide. This ensures show titles and descriptions display correctly in your interface.
Accurate system time is non-negotiable. Verify your server’s clock is synchronized to prevent schedule offsets in your guide. A small drift can make programs appear in the wrong time slot.
Mapping guide data can be a tedious process. However, it is unavoidable if you want a usable interface instead of anonymous streams. The effort pays off with a polished, professional result.
Remember to regularly update your EPG grabber modules. This practice keeps your guide current and reflects the latest programming changes from your providers. Set up a simple cron job to automate this task.
Adding IPTV Content Sources and M3U Playlist Setup
A well-organized playlist file is the bridge between your streaming software and the world of live TV. This file, known as an M3U playlist, is a simple text document. It contains the stream URLs, channel names, and metadata your server uses to discover available services.
You add this playlist by entering its URL into the TVHeadend web interface. The system then parses the content and creates individual muxes for each stream. This process builds the foundation of your channel lineup.
Remember, an M3U file is not a video file itself. It is a list of text files that point to the live video sources. Large playlist files can slow down the initial scan. Keeping your channel list concise and your playlist organized is best for performance.
If a stream URL goes offline, the corresponding channel will fail. Your server software cannot fix broken external sources. Regularly check your playlist for duplicate entries. This prevents confusion and ensures your guide data maps correctly.
Optimizing Network Settings for Smooth Streaming
Network optimization is the final piece for achieving broadcast-quality streaming at home. Your media delivery depends entirely on a stable data path. A weak link here causes constant buffering and ruins the experience.
Always use a wired Ethernet cable for your main server. Wi-Fi is prone to interference that live video cannot tolerate. This single change eliminates most packet loss and congestion issues.
Check your total bandwidth needs. A single HD stream often uses 5 to 10 Mbps. Your home network hardware must handle this for all connected clients at once.
Configure your router to prioritize traffic from your media box. This is often called Quality of Service (QoS). It keeps your system performance stable when other devices are online.
Minimize the distance between your server and your TVs. Reducing network hops lowers latency. This prevents the stuttering that annoys viewers.
For a deeper dive into creating a robust setup, check out this guide on building a reliable streaming server. A solid network foundation makes your entire project worthwhile.
Monitoring and Fine-Tuning System Performance
Your media server’s long-term reliability depends on consistent performance monitoring. A well-tuned setup delivers smooth video without hiccups. It also helps you catch small issues before they disrupt your viewing.
Regular checks give you real-time insights into your hardware’s behavior. This proactive approach is key for a stable streaming environment.
Using htop and Enabling TRIM Support
The htop utility is your window into the server‘s health. Run it from the command line to see CPU use, memory pressure, and load averages. Watch for spikes when users change channels or during recording.
This helps you decide if buffering is a software or network problem. For your storage drive, enabling TRIM support is vital. It keeps your SSD fast by clearing unused data blocks.
Execute sudo fstrim -v / periodically. This maintains peak performance for constant writes.
Temperature Monitoring and Power Management
Keep your device’s temperature below 70°C at all times. Thermal throttling can slow down your system during heavy use. An active cooling case is the best defense.
Check temps with the vcgencmd measure_temp command. Also, ensure your power supply delivers stable voltage. Drops can cause random reboots.
Here are quick actions for a healthy system:
- Monitor resources with htop during peak hours.
- Schedule weekly TRIM commands for your SSD.
- Verify cooling is adequate to prevent overheating.
- Tune settings so multiple streams play without lag.
This fine-tuning ensures your server stays responsive for everyone.
Troubleshooting Common IPTV Setup Challenges
Troubleshooting is a normal part of maintaining any custom media server you’ve built. Even with a perfect setup, small issues can pop up. Don’t worry—most problems have simple fixes.
Your guide might show the wrong time or a channel won’t play. These are common hurdles. A methodical approach will get your system back on track quickly.
Resolving Channel Mapping and Guide Data Issues
Most guide problems come from name mismatches or duplicate entries in your list. If your schedule is off by hours, check your server’s clock. Use the timedatectl command to sync it.
When channels appear but won’t play, test the stream link in VLC player first. This rules out a dead source or a codec error. Manual mapping is often needed to align guide data with the correct stream.
| Symptom | Likely Cause | Quick Fix |
|---|---|---|
| Guide shows wrong times | Incorrect system timezone | Run sudo timedatectl set-timezone |
| Channel fails to play | Dead stream URL or codec issue | Test URL in VLC media player |
| Recording fails repeatedly | Storage latency or permission error | Use a high-speed SSD and check folder permissions |
| Duplicate channels in list | Playlist file has repeated entries | Clean up your M3U file manually |
One major cause of recording failure is slow storage. A quality SSD connected via a powered hub solves this. Always check your software logs when you face playback issues. They pinpoint the exact root cause for your setup.
Ensuring Device Compatibility and Multi-Platform Support
The final step in your project is ensuring your channels play perfectly on TVs, phones, and tablets. A truly flexible setup works everywhere in your home. This turns your custom server into a universal entertainment hub.
For a powerful frontend, consider Kodi. It communicates with your server using the HTSP protocol. This provides native channel browsing, full guide support, and recording control right on your devices.
Always test your streams with VLC Media Player first. This verifies your network and server are delivering a clean signal. It’s the best way to isolate playback problems.
Mobile apps are generally more forgiving of stream variations. Smart TV apps, however, often require perfect streams. They need stable feeds to function without constant buffering.
Ensuring your interface is compatible with various platforms is key. You can then enjoy content on Fire TV, Roku, or Apple TV devices. Each platform may need a specific app from its store.
A well-configured system supports multiple clients at once. You just need sufficient network bandwidth to handle the combined stream requirements. Plan for about 10 Mbps per HD stream.
| Client Type | Key Requirement | Best For |
|---|---|---|
| Kodi | Clean channel mapping & accurate guide data | Power users with set-top boxes |
| Mobile App | Tolerant of stream variations | Watching content on the go |
| Smart TV App | Requires perfect, stable streams | Living room convenience |
| Streaming Box (Fire TV/Roku) | Compatible interface app from store | Main TV setup |
Why Choose GetMaxTV
Imagine accessing over 21,000 live channels and nearly 100,000 movies and shows instantly. GetMaxTV is a premium streaming service designed for viewers who want massive variety without any setup hassle.
It delivers a seamless, high-quality experience right to your favorite devices. This is a great option to complement a custom server or to use on its own.
Premium Features: 21,000+ Live Channels & 97,000+ VOD Titles
You get an enormous library of content in stunning HD and 4K. The service boasts 99.9% uptime, so your favorite shows are always available.
Plans start at just $6.95 per month, offering incredible value. You can try it completely risk-free with a 24-hour trial that requires no credit card.
Enjoy peace of mind with a full 30-day money-back guarantee. The service works on all popular platforms like Fire TV, Roku, Apple TV, and Smart TVs.
It also supports Android, PlayStation, Xbox, and Kodi. The clean interface makes browsing the vast channel list simple and intuitive.
With 24/7 WhatsApp support, help is always just a message away if you need it.
Call-to-Action: Explore GetMaxTV at getmaxtv.com
Ready to transform your viewing? Explore the full range of features and subscription plans.
Visit the official website at getmaxtv.com to start your free trial today. Begin your journey to endless entertainment.
Securing Remote Access to Your IPTV Server
Opening your streaming server to the internet without protection invites serious digital risks. This is a major security error that can lead to brute-force attacks and bandwidth abuse. Your entire network becomes vulnerable.
Setting Up VPN and Firewall Rules
Instead of exposing ports, use a secure virtual private network. WireGuard is a recommended tool for this job. It creates an encrypted tunnel for remote access.
This keeps your system safe from unauthorized connections. You can manage your channel lists and storage files remotely. It feels like you are on your local home network.
Next, configure your firewall rules properly. Allow only necessary traffic, like ports 9981 and 9982 for your web interface. Block all other incoming requests to lock things down.
Keeping your server software updated is also critical. This defends against new threats. Here are the key steps for a secure setup:
- Install WireGuard to create a secure access tunnel.
- Configure firewall rules to allow only essential ports.
- Regularly update all system software and applications.
- Never expose your admin panel directly to the public web.
Following these steps gives you one secure, reliable system for remote management. You gain peace of mind along with convenience.
Conclusion
Congratulations on completing your journey to a personalized home entertainment hub. You’ve built a powerful media server that puts you in full command of your viewing experience.
By following this guide, you learned to configure TVHeadend, manage storage, and integrate guide data for a professional setup. This gives you complete control over your home media distribution.
Remember, consistent performance relies on stable network connections, accurate system time, and regular maintenance of your stream sources. Whether managing local tuners or internet-based content, the principles of stream routing remain the same.
We hope this guide has empowered you to build a robust system that serves your entertainment needs for years to come. Enjoy your new, reliable streaming setup!
FAQ
What do I need to build this streaming device?
You’ll need a single-board computer like a Raspberry Pi 4, a reliable power adapter, a microSD card for the operating system, and an external SSD for storing your channel data and recordings. A good network connection is also crucial.
Which software manages the live TV streams?
TVHeadend is a popular, powerful server application that handles your streams. It grabs content from your provided playlist, organizes it into a channel lineup, and delivers it to other devices on your home network.
How do I add channels to my system?
You add channels by providing an M3U playlist file to your server software. This file contains the direct links to the video streams. You can load it through the TVHeadend web interface to automatically import your entire channel list.
Why is my program guide empty?
An empty Electronic Program Guide (EPG) usually means the guide data hasn’t been properly linked. You need to use a tool like XMLTV to fetch the schedule information and then map it to your channels within your server’s configuration settings.
Can I watch on my phone or smart TV?
A> Absolutely. Once your server is running, you can use various client apps on different platforms. Popular options like Kodi, or dedicated apps on your smartphone, can connect to your server to watch live content from anywhere in your home.
My playback is buffering. How can I fix this?
Buffering often points to a network issue. Try connecting your device directly to your router with an Ethernet cable for the most stable connection. Also, check that no other programs on your network are consuming too much bandwidth.
Is it safe to access my server from outside my home?
Exposing any server directly to the internet can be risky. For secure remote access, it’s strongly recommended to set up a Virtual Private Network (VPN). This creates a safe tunnel back to your home network, keeping your connection private.
Where can I find premium content for my setup?
For a vast selection of reliable, high-quality streams, consider a service like GetMaxTV. They offer over 21,000 live channels and an enormous video-on-demand library, providing excellent content to integrate with your personally built system.
The GetMaxTV Team is a group of cord-cutting experts and streaming technology specialists who have been testing and reviewing IPTV services since 2022. Based in North America, our team personally tests every service we recommend across 15+ devices including Fire TV Stick, Roku, Apple TV, Samsung Smart TVs, and gaming consoles. We verify channel counts, measure buffering rates, test picture quality in HD and 4K, and evaluate customer support response times. Our mission is to help viewers save money by switching from expensive cable subscriptions ($147/month average) to affordable, high-quality IPTV alternatives. Every article on GetMaxTV.com is based on hands-on testing and real-world experience — not recycled marketing claims.