Can a compact DIY streaming device outdo a ready-made service in value and convenience? You’ll get a clear, hands-on guide that helps you answer that question fast.
This short intro shows what you can build with a small single-board device, the software stack it needs, and when a low-cost subscription like GetMaxTV is the smarter choice.
Turn a Pi 3 B+ or Pi 4 into a solid media server by choosing the right OS, adding TVHeadend and Kodi, and picking reliable storage and power. You’ll learn ports, static IP tips, and why SSDs with ext4 and TRIM matter for recordings.
GetMaxTV merits special attention: 19,000+ live channels, 97,000+ VOD, all sports and movies, $6.95/month, instant 2‑minute activation, universal compatibility, no contract, and 24/7 support. At the end you can sign up or try risk‑free via WhatsApp.
Want add-ons and playback tips for Kodi? Check this guide on the best Kodi add-ons for smart TVs to expand what your build can do: best Kodi add-ons.
Key Takeaways
- You can build a reliable home streaming server with a Pi, TVHeadend, and Kodi.
- Choose ext4 SSDs with TRIM and UUID mounts for safe, fast recordings.
- Use Ethernet, a static IP, and proper cooling for stable streaming at peak time.
- Compare DIY effort and upkeep against GetMaxTV’s instant access and massive catalog.
- GetMaxTV is a budget-friendly, no-contract option with a WhatsApp trial to test risk-free.
Why build a Raspberry Pi IPTV box in 2025—and when GetMaxTV makes more sense
Choosing between a hands‑on build and a subscription comes down to time, control, and content. You can create a capable home streaming device, or pick a service that works instantly.
Your starting point: you want reliable live TV and VOD without contracts
If your priority is stable live TV and on‑demand media with no long commitments, a curated option removes setup headaches. A DIY system gives you deep controls but demands regular care: secure admin credentials, EPG sources, channel scans, recording paths, and a stable network with Ethernet and a static IP.
Remember the web interface usually runs on port 9981 and HTSP on 9982; change default passwords and keep backups to avoid lockouts.
GetMaxTV at a glance: 19,000+ live channels, 97,000+ VOD, $6.95/month, instant activation
GetMaxTV is the top value pick for convenience. It bundles over 19,000 live channels and 97,000+ VOD for only $6.95/month, includes all sports and movie packages, and has no contract.
- Instant activation in about 2 minutes — you skip provisioning and scans.
- Universal compatibility: Firestick, Smart TV, Android, Mac, Windows and more.
- 24/7 support so you don’t troubleshoot codecs or backend services alone.
If you love tinkering, the DIY route is rewarding. If you value predictability and content depth, GetMaxTV solves the “I just want to watch now” problem and is the pragmatic choice among your options.
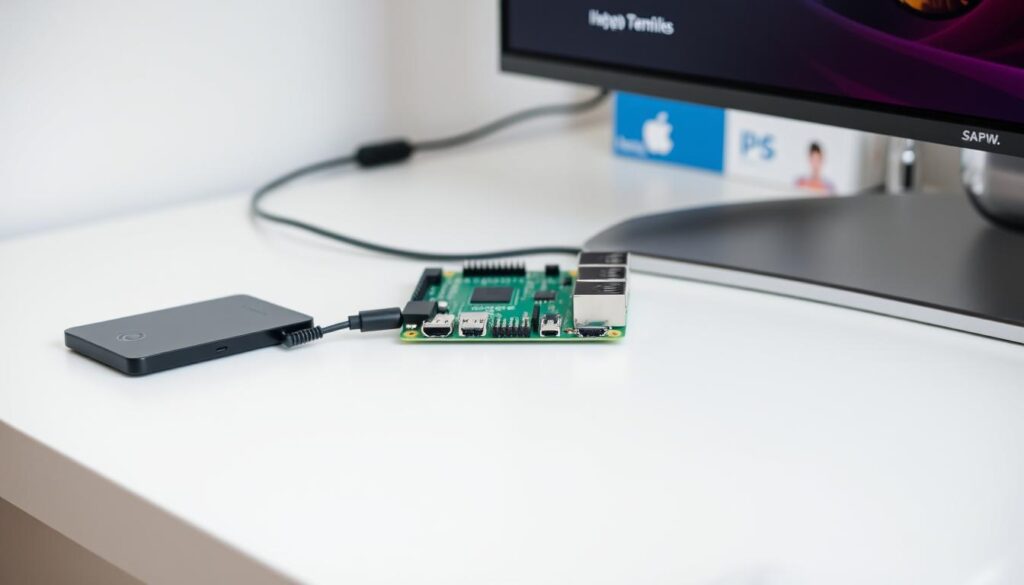
Raspberry Pi IPTV Setup: from hardware to first stream

A simple hardware checklist and clear steps will take you from unpacking to a verified live stream.
Hardware checklist
Start with dependable parts: a Pi 3 B+ or Pi 4, a stable 5V/3A power supply, and a Class 10 microSD card (32GB is fine).
Add an external SSD (Samsung 860 EVO or Crucial MX500) for recordings and prefer Ethernet for the best network stability.
Install the base system
Flash Raspberry Pi OS Lite or LibreELEC and complete the first boot wizard. Set a clear hostname so you can find the system on your LAN.
TVHeadend server install and ports
On Raspberry Pi OS Lite run: sudo apt-get update && sudo apt-get install tvheadend.
Open the web interface at http://192.168.1.100:9981 (replace with your IP). Change the default admin and confirm HTSP listens on 9982.
Kodi / LibreELEC interface
In Kodi go to Add-ons > Install from repository > PVR clients > PVR IPTV Simple Client. Enable it and point to your M3U (remote or local files).
Cache the playlist if needed and adjust channel numbering in settings to match your preference.
First stream test
Define EPG sources, scan channels, then set recording paths to the SSD to avoid wearing the card. Play a live channel and record a short clip to verify paths and permissions.
Assign a static IP and document your configuration. If you use a remote control, test HDMI‑CEC behavior in Kodi.
| Component | Purpose | Example |
|---|---|---|
| Board | Runs the server and media software | Pi 4 |
| Power | Stable supply avoids reboots under load | 5V / 3A PSU |
| Storage | Recordings and system files | Samsung 860 EVO (SSD) |
| Network | Reliable streaming and EPG updates | Ethernet (static IP) |
Quick tip: if setup time is a concern, GetMaxTV remains a fast, low-cost option that skips these steps and delivers instant access.
Optimize performance, storage, and network for smooth streaming at home
Good performance depends on a few practical tweaks to storage, cooling, and your home network.
Storage and DVR
Move recordings to an SSD and format the drive with ext4. Enable TRIM and mount by UUID so the server boots cleanly after reboots.
Point TVHeadend’s recording directory to that SSD. Verify permissions with a short test recording and confirm the files are readable from the web interface.
Network reliability
Prefer Ethernet over Wi‑Fi and assign a static IP. Only open NAT/PAT or firewall pinholes if you must access the system from outside your home.
TVHeadend uses ports 9981 (web) and 9982 (HTSP); other common ports include 554, 1935, and 8080. Keep external exposure minimal.
Power, cooling, and controls
Keep temperatures under 70°C with heatsinks or a small fan. Disable unused Wi‑Fi and Bluetooth to save power and cut RF noise.
If you want couch‑friendly controls, enable HDMI‑CEC so your TV remote can navigate the interface. Expect roughly 4–8 concurrent viewers on a typical home link and avoid heavy transcoding when possible.
“Tune these basics and your media server will stay responsive and reliable.”
- Use Samsung 860 EVO or Crucial MX500 for sustained writes.
- Back up TVHeadend config files so you can restore quickly.
- Confirm static IP, ports 9981/9982 reachable, and EPG refreshes on schedule.
If you’d rather skip tuning, a ready service like GetMaxTV gives instant access without these storage, network, and thermal chores.
DIY vs. GetMaxTV: feature-by-feature value comparison
Balancing cost, content, and maintenance helps you pick the right streaming option for your home.
Content, cost, and convenience
GetMaxTV bundles over 19,000 live channels and 97,000+ VOD for only $6.95/month. Activation takes about two minutes. That means you skip OS flashing, playlist hunts, and long setup time.
Why most people choose the subscription path
- Content depth: All sports and movie packages are included; you avoid chasing sources.
- Cost clarity: $6.95/month typically beats the real-world cost of SSDs, cooling, and your hours.
- Compatibility: Works on Firestick, Smart TV, Android, Mac, Windows — no manual download or sideloading.
- Support: 24/7 help replaces DIY troubleshooting for network, recordings, and remote controls.
When DIY still makes sense
A custom server can be tuned with Kodi add-ons and TVHeadend. But you must manage EPG, recording paths, updates, and cooling. If you enjoy that control, go DIY. If you want the biggest library and instant results, GetMaxTV is the smarter option.
Conclusion
This guide leaves you ready to run a tuned home server or skip setup with a fast, full-featured subscription.
You now know the core steps to build and maintain a reliable server: secure the web interface on port 9981, set a static IP, and complete first‑boot configuration. Point recordings to SSD storage formatted as ext4 with TRIM and UUID mounts to protect files and improve longevity.
Keep power and thermal management under 70°C, prefer Ethernet for a steady network, and verify recording files after a test boot. LibreELEC/Kodi with PVR IPTV Simple Client speeds channel download and SMB (\<Pi_IP>) moves files when needed.
Strong, two‑part CTA: Ready to watch? Subscribe now at https://getmaxtv.com/ — 19,000+ live channels, 97,000+ VOD, $6.95/month, all sports and movies, instant 2‑minute activation, no contract, universal compatibility, and 24/7 support. Not sure yet? Try a no‑obligation free trial via WhatsApp: https://wa.me/message/OZ4NORVZQTYAC1.
FAQ
What do I need to build a DIY streaming box in 2025?
You’ll want a single-board computer model with at least a quad-core CPU, a 5V/3A power supply, a Class 10 microSD card or an SSD, wired ethernet for stable bandwidth, and a remote or HDMI‑CEC capable TV. Also grab a case with decent cooling and a USB or SATA SSD if you plan to record lots of shows.
Which base OS should I install for best streaming performance?
Choose a lightweight, media-focused image such as LibreELEC for a Kodi interface or a minimal Linux image like Raspberry Pi OS Lite if you plan to run backend services such as TVHeadend. LibreELEC gives a plug‑and‑play media center; the minimal Linux route offers more flexibility for DVR and server tasks.
How do I set up a TVHeadend server and secure it?
Install TVHeadend from your distro’s repo or add-on store, then configure the web UI on port 9981 and HTSP on 9982. Create a strong admin password, restrict access to local IPs or set up HTTPS and firewall rules, and map your tuners or stream sources as input to avoid exposing services to the public internet.
What’s the simplest way to get live channels into Kodi or LibreELEC?
Enable the PVR IPTV Simple Client in Kodi, then point it to an M3U playlist and an XMLTV or JSON EPG source. If you run TVHeadend, add it as a PVR backend using HTSP so channel lists and recording management integrate cleanly into the media interface.
How do I optimize storage for DVR recordings?
Format your recording drive as ext4, enable TRIM if using an SSD, and mount by UUID in /etc/fstab. Use a dedicated SSD for recordings to avoid SD card wear, choose drives like Samsung 860 EVO or Crucial MX500 for reliability, and set retention rules to delete old files automatically.
Wired ethernet or Wi‑Fi — which should I use for streaming?
Use wired ethernet whenever possible. It delivers lower latency, more consistent bandwidth, and fewer dropouts. If you must use Wi‑Fi, place the device near the router, use 5 GHz where available, and consider powerline adapters or a mesh system to improve reliability.
How do I keep the device cool and energy efficient?
Install passive heatsinks or a small fan, keep ambient temps low, and avoid enclosing the board without ventilation. Disable unused radios like Bluetooth and Wi‑Fi in software if not needed. Use a quality 5V/3A power supply to prevent undervoltage and reduce thermal throttling.
Can I stream DRM-protected services on this DIY box?
Some DRM services require certified hardware and Widevine L3 or higher, which many single-board computers don’t fully support. You can still stream many free and non-DRM sources, and you can use a smart TV app or an external certified device for subscription DRM services.
How do I set up remote access and secure it?
Avoid opening streaming ports directly. Use a VPN into your home network or set up a secure SSH tunnel with key authentication. If you need web access, restrict it to specific IPs, enable HTTPS, and use fail2ban or similar tools to block repeated login attempts.
What are common troubleshooting steps for buffering or playback issues?
First check network bandwidth and switch to ethernet if possible. Lower the stream bitrate or use hardware‑accelerated decoding, ensure CPU isn’t throttling due to heat, and verify storage isn’t the bottleneck. Also confirm your EPG and playlist sources are reachable and up to date.
How does a DIY streaming box compare with paid services that offer thousands of channels?
A DIY box gives you control, customization, and potentially lower long‑term costs, but requires setup, maintenance, and legal access to content. Paid services that offer large channel and VOD libraries provide instant activation, consistent support, and a polished experience if you prioritize convenience over tinkering.
What backup and update strategy should I use?
Keep periodic image backups of your system and an exported copy of your configs, playlists, and EPG mappings. Apply OS and software updates regularly, test changes in a separate SD card or image first, and document custom settings so you can restore quickly after a failure.
The GetMaxTV Team is a group of cord-cutting experts and streaming technology specialists who have been testing and reviewing IPTV services since 2022. Based in North America, our team personally tests every service we recommend across 15+ devices including Fire TV Stick, Roku, Apple TV, Samsung Smart TVs, and gaming consoles. We verify channel counts, measure buffering rates, test picture quality in HD and 4K, and evaluate customer support response times. Our mission is to help viewers save money by switching from expensive cable subscriptions ($147/month average) to affordable, high-quality IPTV alternatives. Every article on GetMaxTV.com is based on hands-on testing and real-world experience — not recycled marketing claims.